Shopping Cart
reviews
92%
(773)
4%
(36)
1%
(6)
0%
(4)
3%
(24)
Great Quality

Great Quality bike for the price perfect starter bike for my 7 year old and very fast

Cones

They do exactly as you’d expect decent quality
We bought our little boy a ride on Lambo turns out if you drive over them they break but you would expect that to be fair (wasn’t intentional I clearly can’t drive)

Very good

Price is very good and delivered on time

Dirtbike

It broke within two days and I brought it for my sons birthday and the suspension snapped within 2 days

24v lambo sto

Car looks amazing and really is fast , looks so good I just had to drive it , squeezing my 13stone self in and it flew me around the car park

Online Chat Available
Mon – Fri
10am – 4pm

Free Mainland UK Delivery - over £50
Hassle Free Returns
Price Match Promise

Stomp Kayo Raging Bull 110cc Kids Quad Bike

SKU:KAYO110

CYBER MONDAY

:
:
:

£1,149.00

Item out of Stock
Elementor Single Product #8277
Clearpay Logo
[iconic_wlv_links]

Out of stock

Goes well with....

Kayo 110cc Raging Bull Kids Quad Bike

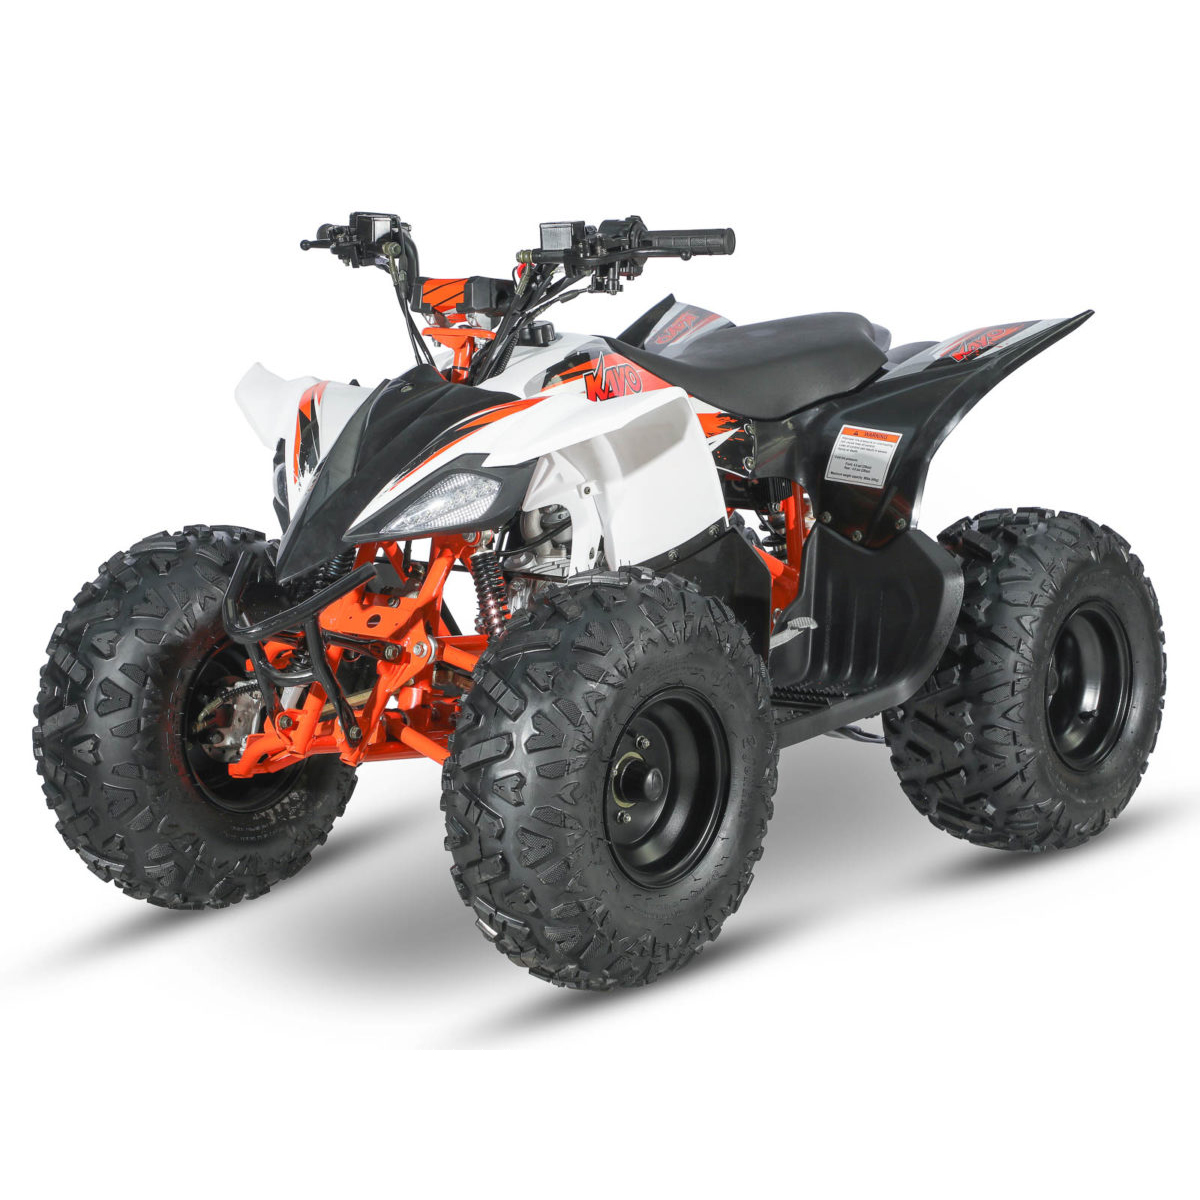
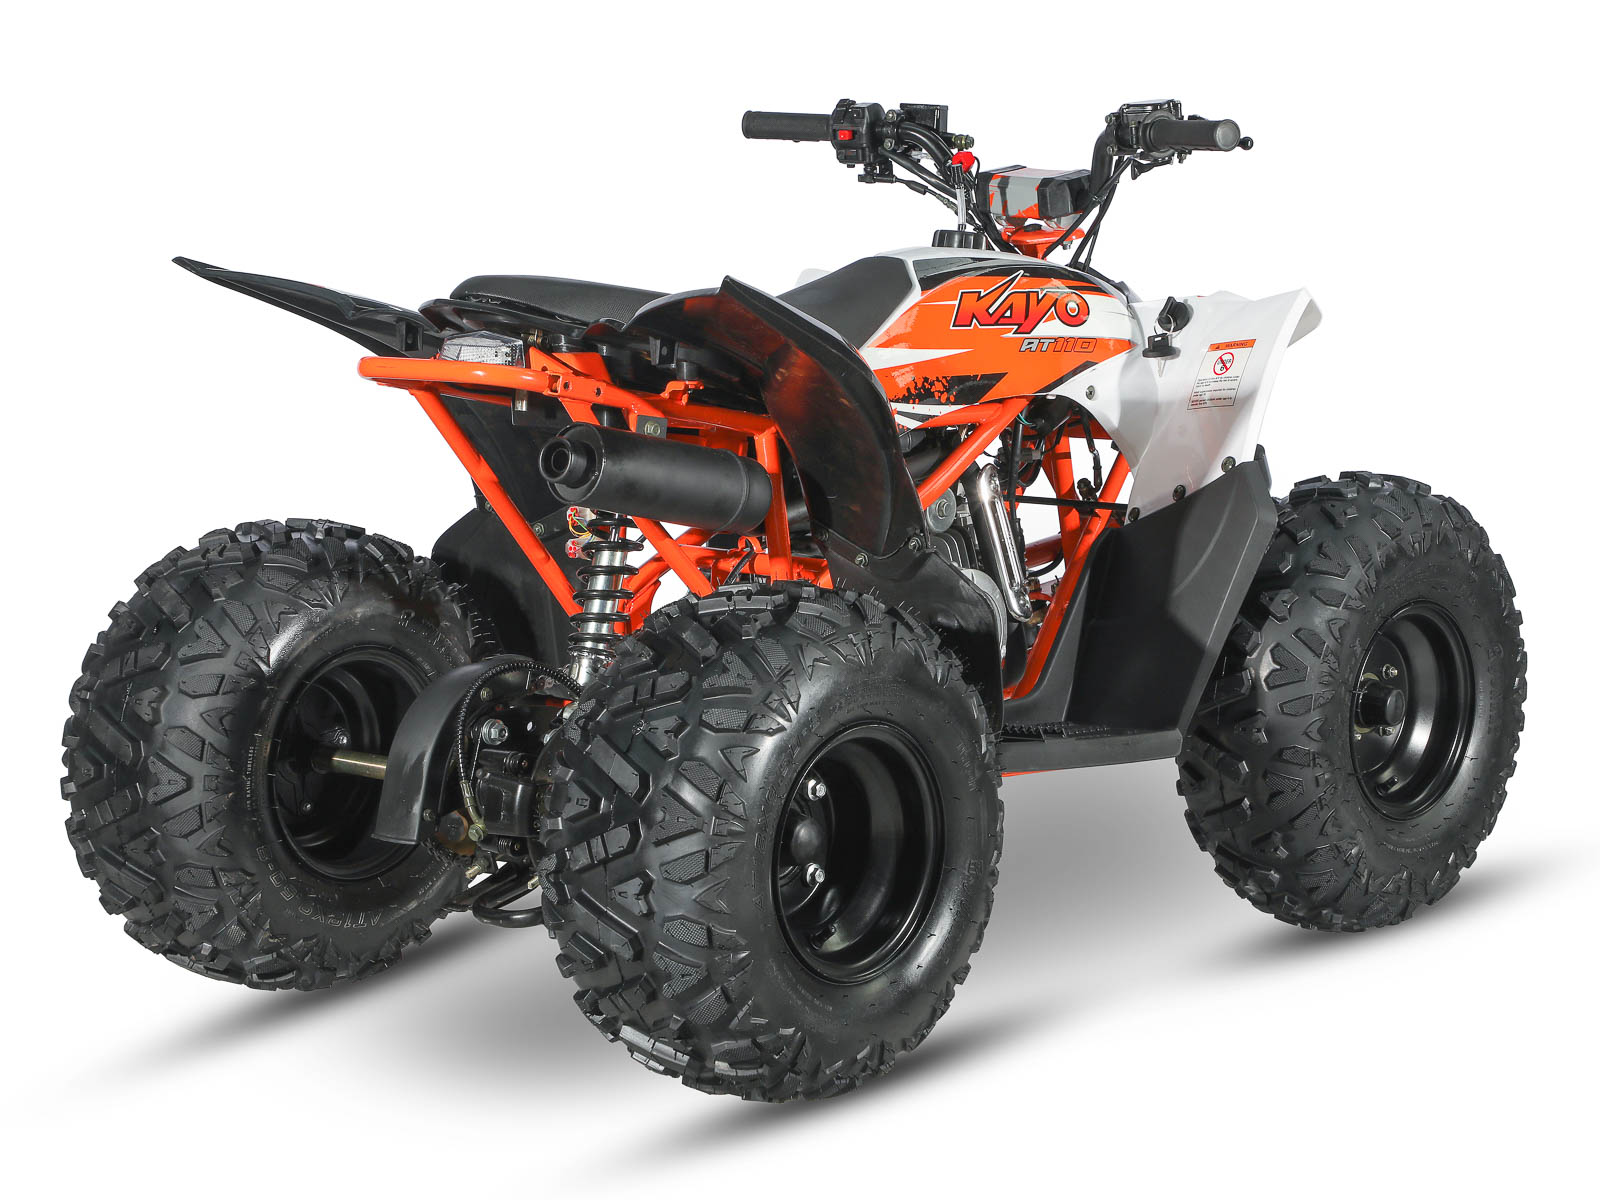
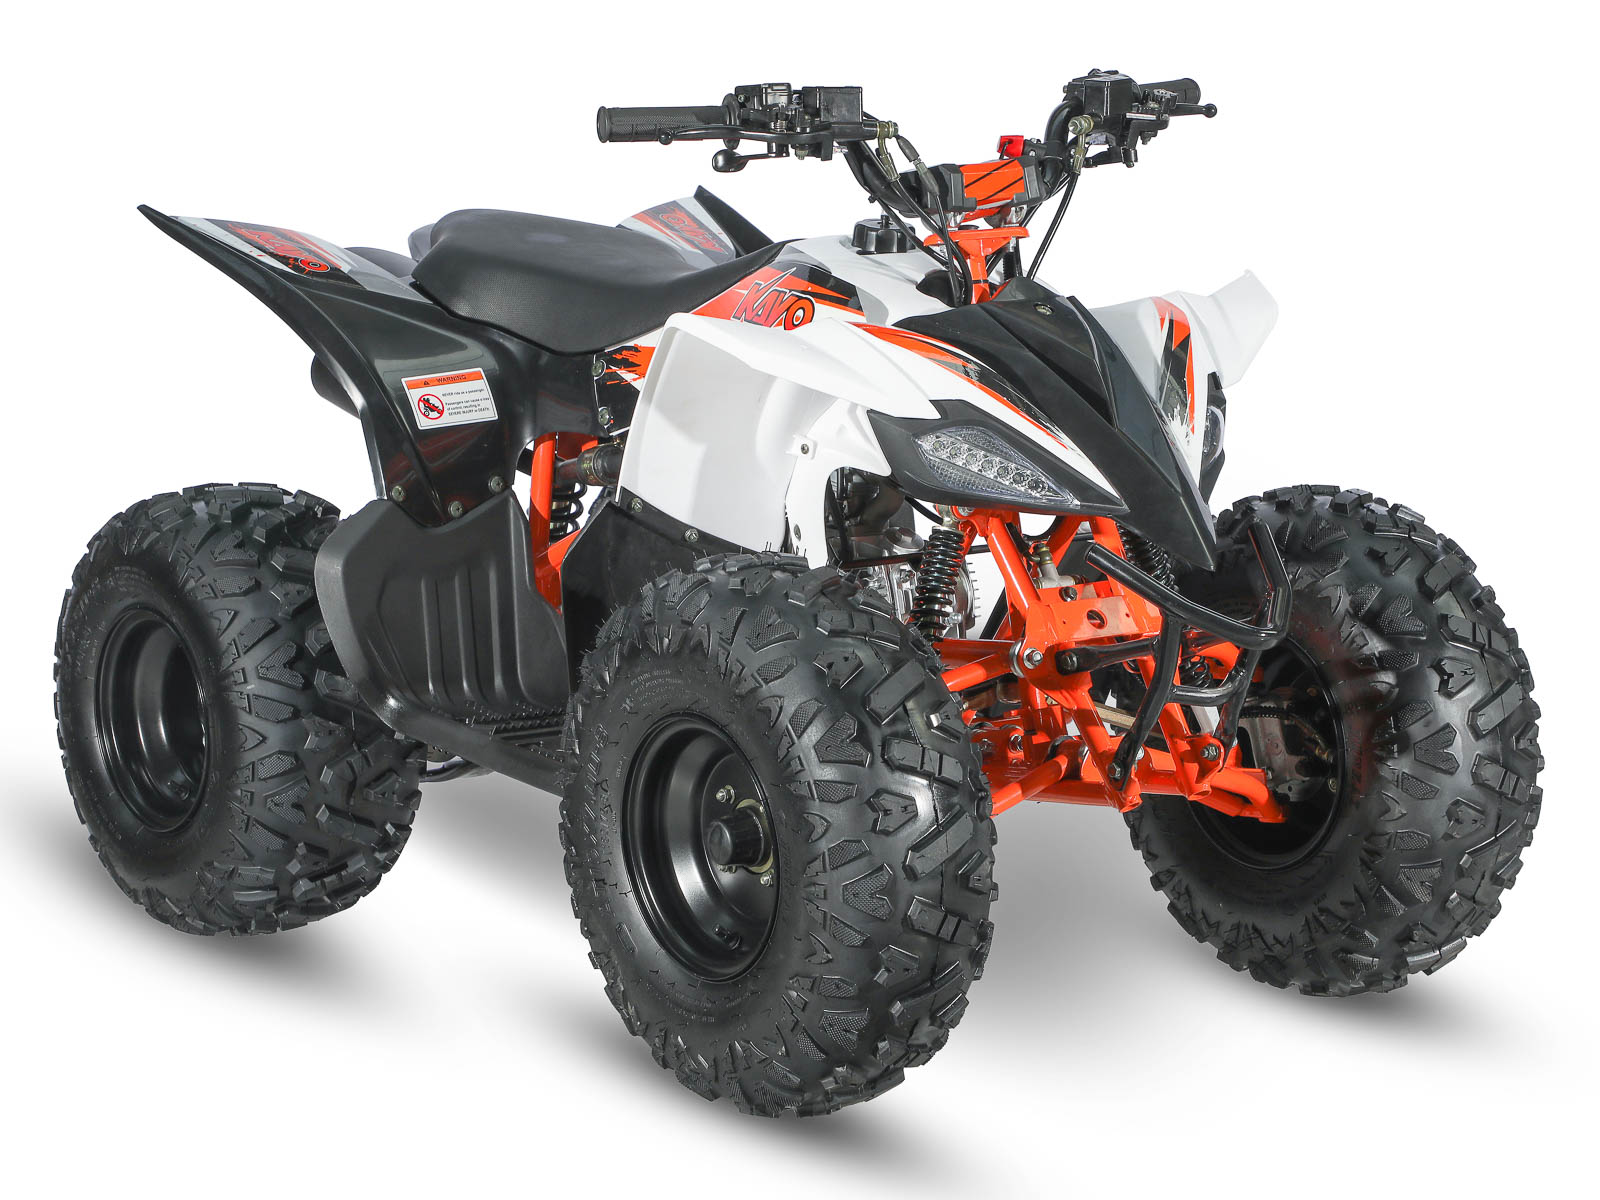
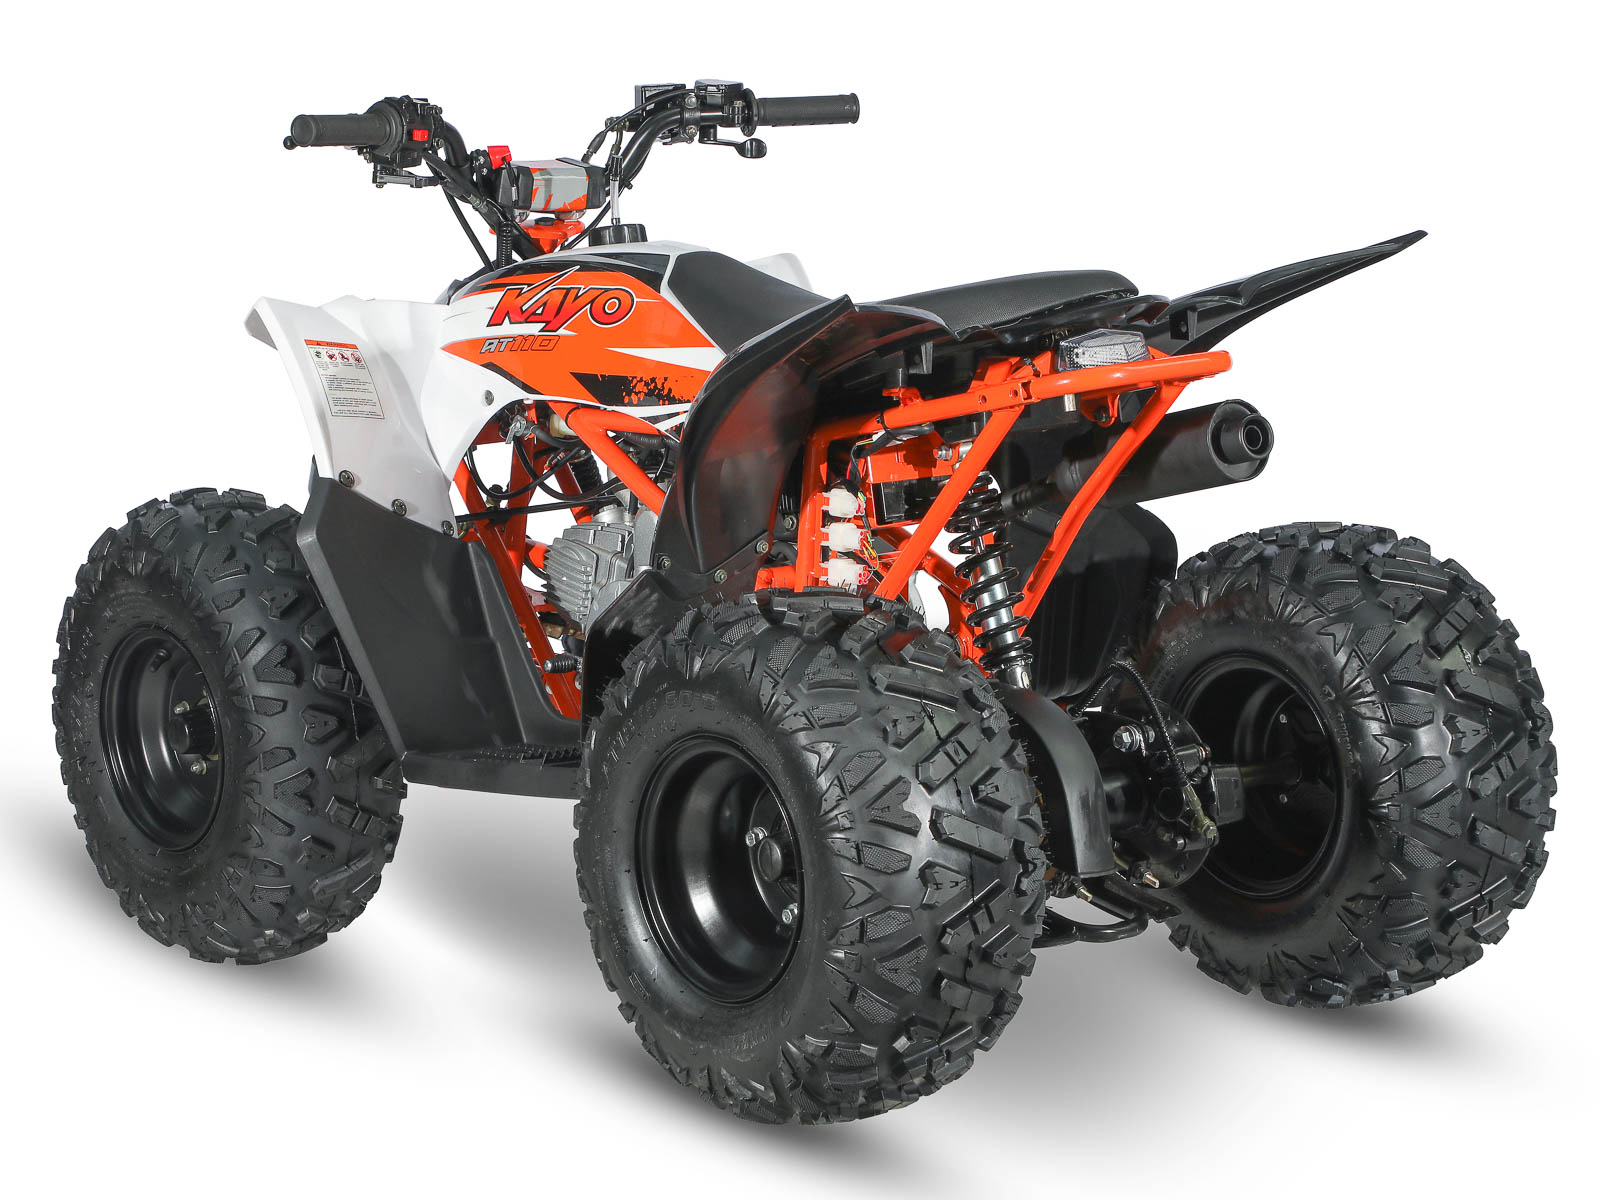
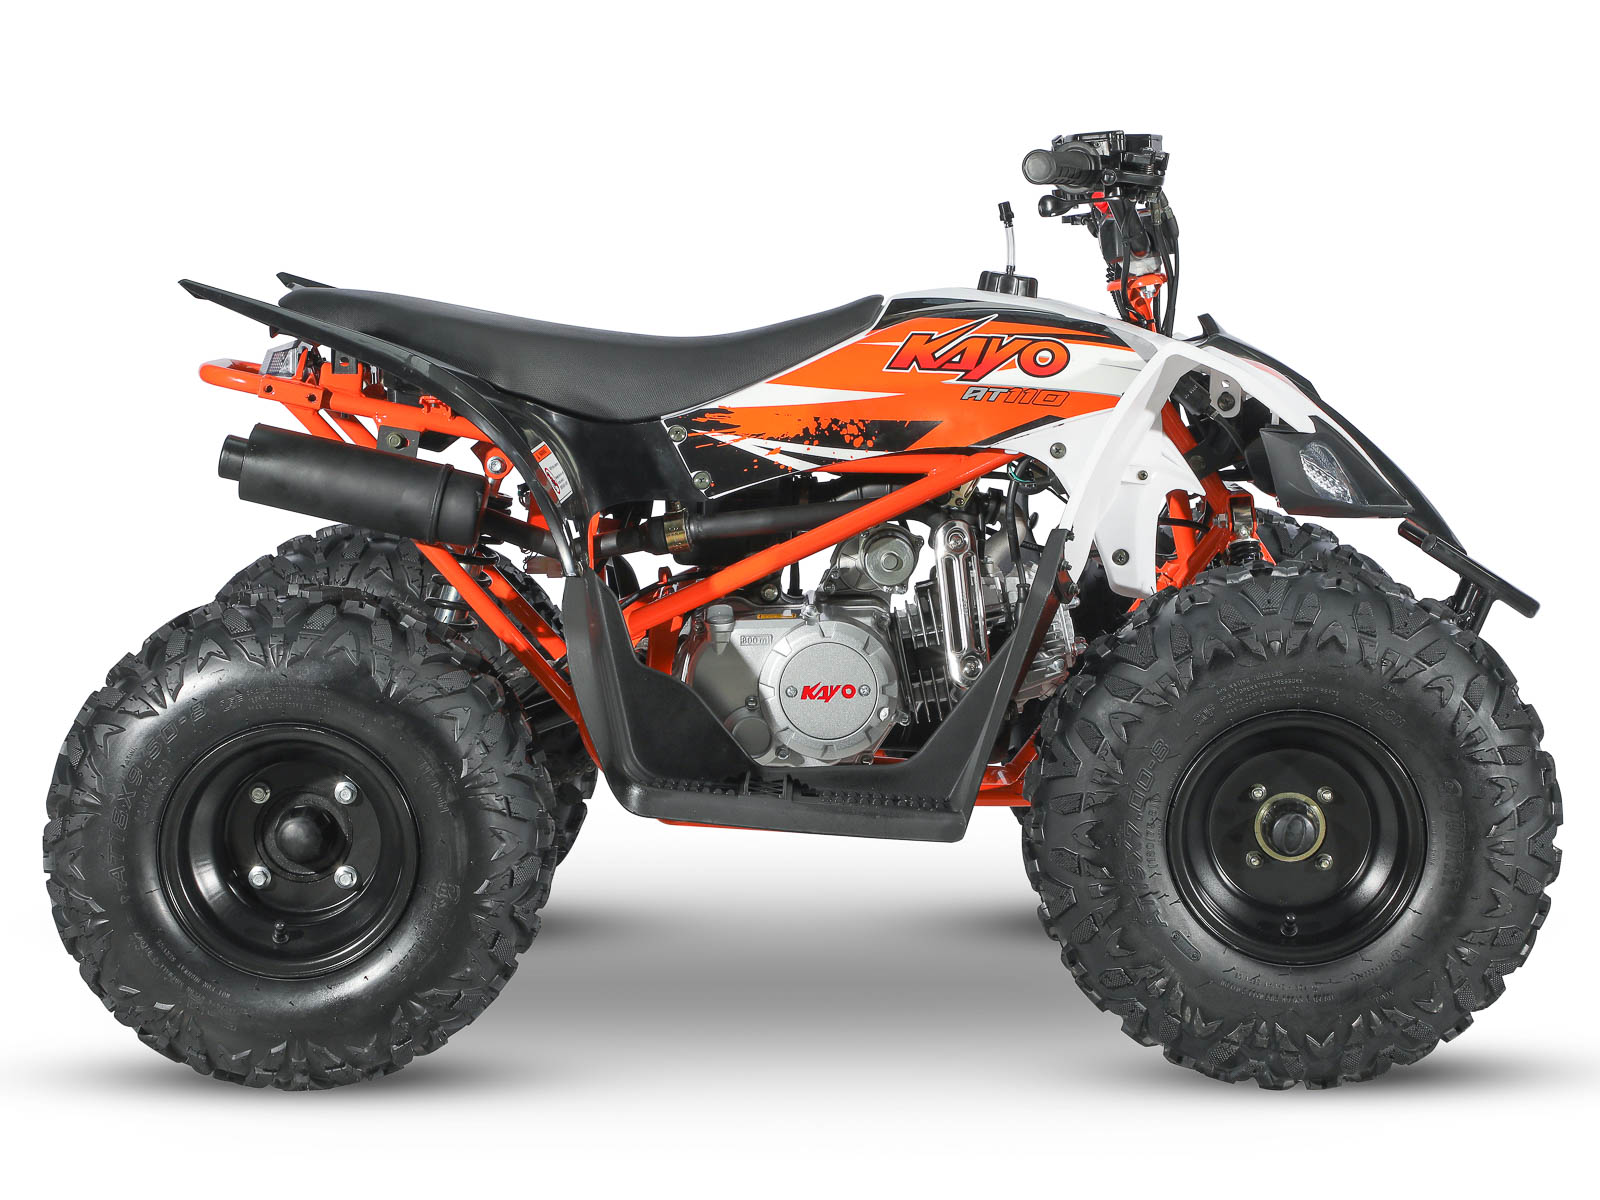
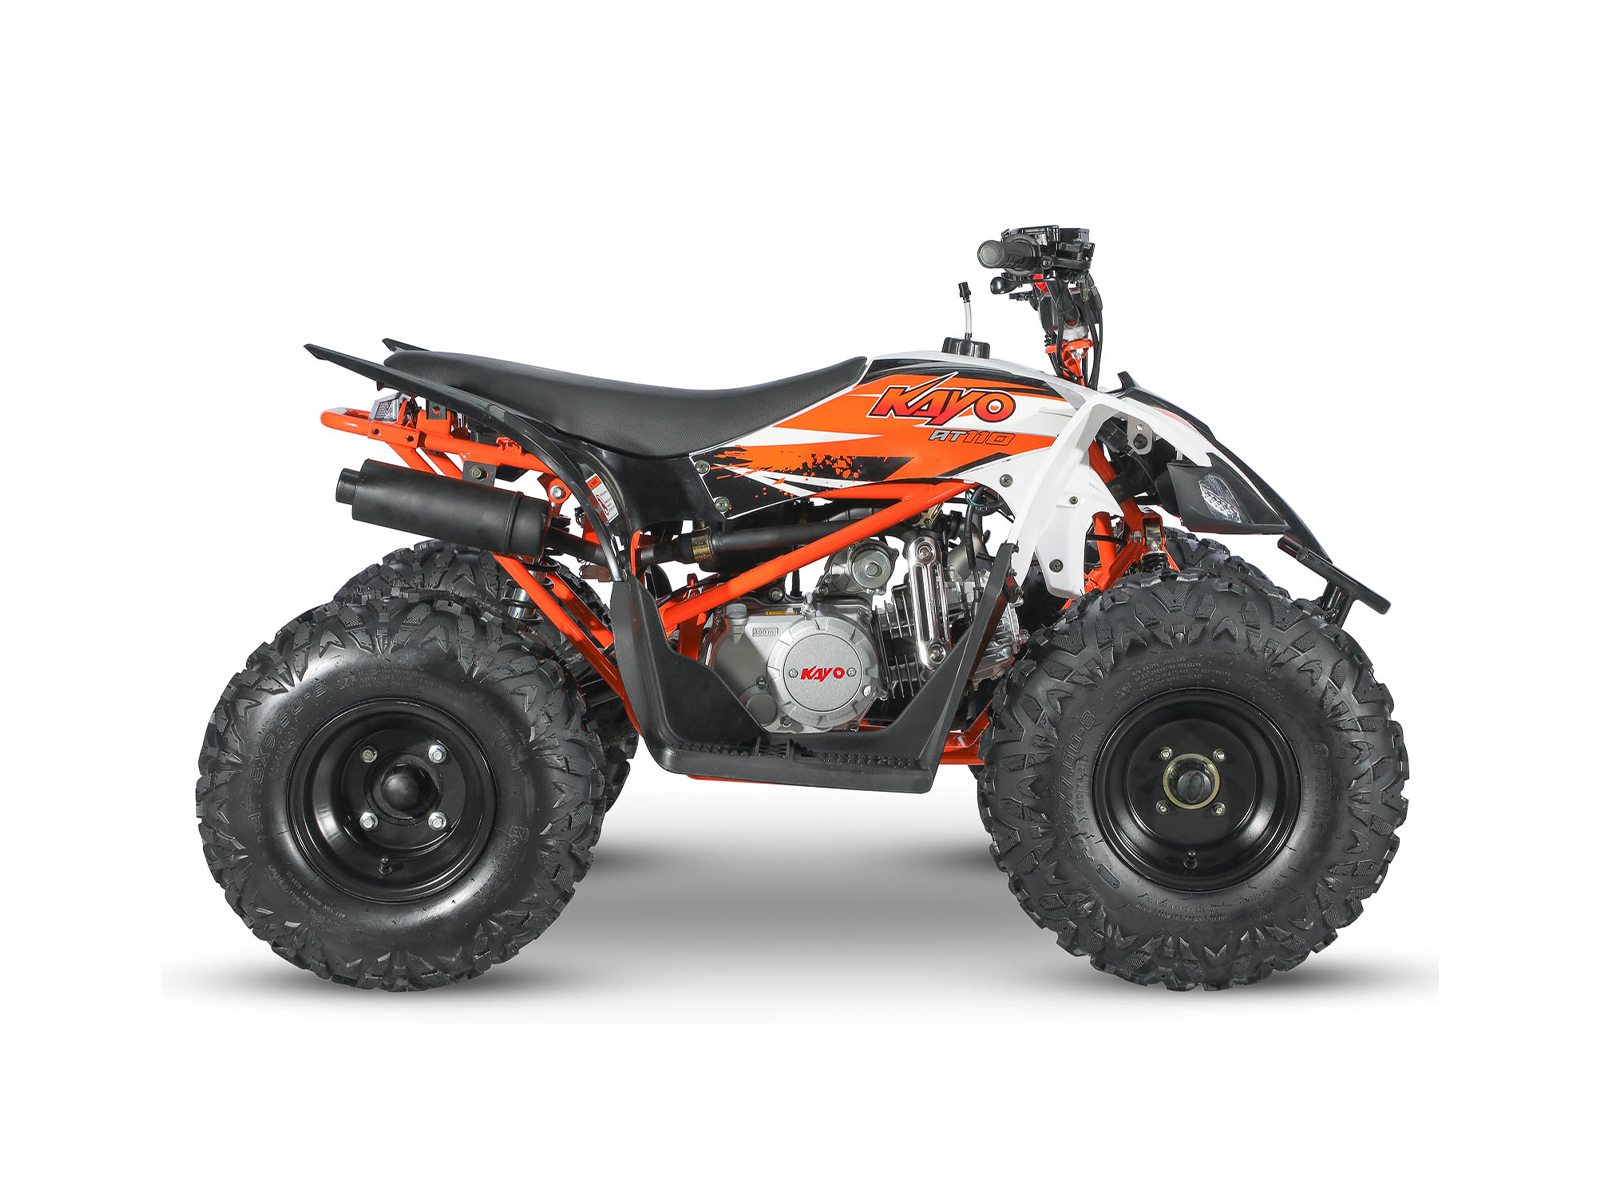
Stomp Kayo Raging Bull 110cc Kids Quad Bike is our entry higher performance ATV aimed at children (supervised) from 10 years and upwards.

From the manufacturers of Stomp Pit Bikes and with significant design input from Stomp Racing in the UK, you can rest assured the Raging Bull 110 has been carefully considered with safety, performance, durability and ultimately fun being the key factors.

The Raging Bull 110 features an electric start and is fully automatic with adjustable throttle restrictor & safety cut-out lanyard.

The exhaust has been designed to be quiet & the electrics are of quality construction to cope with regular power washing. One key feature not to be missed is the fully independent double-wishbone front suspension making this ATV stand out as the top performer in its class.

The handling and stability really are second to none.

Also to note, stylish plastics & a powerful yet versatile 110 cc 4-stroke engine making this the mini off-road racers dream quad bike (and all for a very reasonable price). Kayo ATV’s are designed to be ridden regularly and are thus totally serviceable.

The kayo 110cc raging bull may be great value for money, but do not confuse it with generic Chinese rubbish you will find online from many other retailers, this is truly a serious quad bike (not a toy).

If you are looking for a high-performance, quality, rugged and stable ATV designed to last many years with an unprecedented dealer network & spares back-up, The Raging Bull 110 is definitely for you.

Kayo 110cc Raging Bull Kids Quad Bike

Manufacturer – Kayo

Distro – Stomp Racing Ltd

Model – Raging Bull 110 ATV

Engine -4 stroke – YX110cc

Transmission – Automatic / reverse

Start – Electric

Front tyres – 16×8-7

Rear tyres – 16×8-7

Brakes – Twin front & single rear

Park Brake – Front

Suspension – Independent Twin Wishbone with adjustable camber

Lanyard – Fitted

Lights – Headlight & taillight

Wheel Base – 900 mm

Fuel Capacity – 2.1 litres

Dry Weight – 94.5 kg

SEAT HEIGHT – 615 mm

Decals – Poly-propylene with 3M decals

The Raging Bull 110 ATV comes with a 6 months parts only warranty as standard.

Dimensions:

Width from outside wheel to outside wheel – 90cmBottom of seat height – 61cm

Stomp kayo raging bull 110cc kids quad bike
kayo 110cc raging bull

View all Kids Quad Bikes

[id= 5619]

Additional information

Weight 80 kg
Battery Type

Lead Acid

Clutch

Automatic

Gears

Automatic

Engine

110cc

Engine Oil

10W – 40 semi synthetic

Rim Size

7in

Suspension

Twin Front – Single Rear

Delivery

Please Note!

By accepting our terms and conditions at checkout you are agreeing to the courier leaving your parcel in a safe place should nobody be available to take delivery when he arrives. Outsideplay will take no responsibility for any theft that occurs on your premises.

Delivery is free on all orders over £50 throughout Mainland UK excluding highlands and Islands if you choose Economy Delivery at Checkout. This is a 3-4 working day service but can be much faster.

Monday to Thursday Economy Delivery Free  –  Order before 1pm and choose Free Economy Delivery for Delivery within 3-5 Days.

Monday to Thursday Express Delivery –  Order before 1pm and choose Express Delivery for Delivery the next working day Charged at £9.99 or £29.99 if its a large palletised item

Weekend Orders– Start after 1pm on Friday until Midnight on Sunday and include bank holidays
Weekend Orders Choosing Express Next Day Delivery will receive their orders on the Tuesday latest Wednesday.

Weekend Orders – Free Economy Delivery – Orders Placed over the weekend will be dispatched on the Monday excluding bank holidays and will be delivered within 3-5 days of order free of charge.

Once your product has shipped via DPD or DHL or Palletforce. You will receive an automatic email from our warehouse team with your tracking details, You can track your parcel after 5pm of the day you receive your tracking number.

Please Note – We are not currently shipping to Europe or Southern Ireland or the Islands

We are shipping certain products to Northern Ireland. Delivery charges are set by the product type, we would advise that you contact us to check if delivery of the product you wish to purchase is possible before ordering .

On every product page, you will find the delivery options available for that product. The options are as follows and will show delivery times for UK MAINLAND depending on which warehouse our stock is located in. You will be asked to make your selection in the checkout.

  • Standard (3-5 day delivery) UK Mainland
  • Northern Ireland – We are currently unable to ship parcels to Northern Ireland Due to complications caused by Brexit and import export procedures - this is a 5 day service
  • Southern Ireland – We are currently unable to ship parcels to Southern Ireland Due to complications caused by Brexit and import export procedures
  • Highlands and Islands - Highlands Mainland Only surcharge is calculated by postcode at checkout and is a 5 days service
  • Expedited (order by 2pm Monday – Thursday for same day dispatch)
  • Click and collect from our warehouse is currently unavailable due to covid restrictions
  • International – We Do Not Ship Internationally

Area’s which are excluded from the Free Delivery Promise. Large Parcels and Pallets

  • Scottish Highlands & Offshore Islands (includes Scottish Islands, Isles of Scilly, Channel Islands, Isle of Wight, Isle of Man, Inverness)
  • AB10-AB25, AB30-56 POSTCODE ££39.99 Surcharge
  • IV* POSTCODE £39.99 Surcharge
  • PO30-41* £39.99 Surcharge
  • BT* POSTCODE £99.00 Surcharge
  • GY*,JE* £126.00 Surcharge
  • ZE POSTCODE - No Shipments are possible
  • HS* POSTCODE No Shipments are possible
  • Jersey £126.00 Surcharge
  • Northern Ireland £99.00 Surcharge
  • Republic of Ireland No Deliveries Available
We are unable to ship larger parcels to Any of the Isles

For more info please see our Delivery and Returns Policy.

Build Information

This Quad Bike you have bought is one of the best available in its price bracket We put every conceivable effort into sourcing and specification in order that you will enjoy your machine to the full.

Your bike will  be supplied in a crate. This is NOT the same as buying a bike fully PDI’d (Pre-Delivery Inspection) bike from a dealer. It is entirely your responsibility to ensure a qualified motorcycle mechanic puts your bike together correctly. Failure to do so will invalidate the warranty supplied with your bike.

GUIDE FOR ASSEMBLY

This document is supplied only as a guide to a professional and may not be exhaustive. Each machine may require individual attention & therefore ONLY qualified persons should only carry out the following:

  • Remove Bike & all accessories from crate & inspect to ensure all necessary parts have been supplied correctly
  • Mount shock (where applicable)
  • Mount front wheels & ensure free rotation – check for potential bearing &/or brake drag Ensure all frame bolts are tight (use thread lock compound where necessary) – Use locking wheel nut (supplied) install locking split pins into each castle nut.
  • Pump front brake lever until firm (bleed if necessary). Check front braking system for potential leaks or damage by pulling brake lever very hard several times. Visually inspect all joints for leaks & remedy where necessary. Spin wheel to ensure calliper is releasing from disk
  • Check brake fluid levels, top up with DOT4 where necessary
  • Fit front footwells using thread locking compound where required
  • 2 Stroke mini quads and mini bikes mix fuel at 25:1 Ratio using a quality semi synthetic 2 stoke motorcycle oil. DO NOT USE GARDENING OR MOWER 2 STROKE OIL it fouls the plug and causes the bike to misfire, bog out and not start.
  • 4 Stroke 110cc and 125cc use straight unleaded fuel and replace engine oil as below 

IMPORTANT! CHAIN ADJUSTMENT

Before First Ride

  • Loosen rear axle & adjust chain tension. Find tightest point in chain by spinning rear wheel, there should 15mm up & 15mm down at the longest section of chain with rider sat on bike. Ensure chain runs true & is on top of chain roller if your models has one.
  • You can ensure chain runs true by eye then by straightening the front wheels and measuring from wheel rim front to wheel rim rear and repeating on opposite side the measurements should be same both sides. If this measurement is out your axle needs aligning and your chain will come off as its not running true.

When aligning chains its important to loosen off the top and bottom axle bolts before attempting the chain adjusters otherwise you will thread the adjusters as it tries to pull a fixed solid axle. Chain adjusters must be adjusted evenly on both sides to keep the axle square otherwise you risk throwing your chain off and damaging your engine.

Chain tension must be done with the rider on the quad bike as each rider weight will change the chain tension needed.

Nut and Bolt Check

  • Working from front to rear, ensure all nuts & bolts are tight. Where no nyloc nuts or spring washers are present, ensure thread-locking compound has been used. If none has been used during factory assembly, remove nut or bolt, apply locking compound & re-tighten. Pay particular attention to the following critical safety areas: Wheel nuts, brake calliper bolts (thread lock), Top & rear engine bolts (frame must be hard tight against the engine, use thread lock), chain tensioners, rear shock bolts, handlebar clamp bolts (yokes), Handlebars, brake/ clutch/throttle, swing-arm, front & rear sprocket, Exhaust Bracket Bolts,
  • Check all engine hardware is tight, (including but not exclusive): flywheel, inlet manifold, exhaust bolts,
  • Fully ensure nothing is touching the exhaust system including fuel lines are tied away.
  • Ensure all cables and pipes & wiring are away from moving components such as the wheels, use cable ties where necessary
  • Fuel bike & check for fuel leaks

Fill and Check oil level with quad bike in upright position using dipstick. Top up with Lucus Oil 10W 40 semi synthetic motorcycle oil, if necessary

  • Adjust tension for both clutch & throttle cables
  • Ensure wheels are tight & wheels run true
  • Start engine & warm up (using choke if necessary). Set idle speed so engine ticks over comfortably without stalling or racing

(bearing in mind that the pads will need to bed in prior to optimum performance

1 HOUR SERVICE – EXTREAMLY IMPORTANT

  • Remove Transport Oil & replace with Lucus Oil 10w 40 4-stroke engine oil
  • Re-Adjust throttle cable & clutch cable if required
  • Re-tension chain as this will stretch in the first hours of use. This will need continual monitoring.
  • Check wheel bearings for any sign of wear of free-play
  • Check Engine Idle Speed and adjust if necessary
  • Check brake calliper operation & brake pad wear
  • Check tyre pressures 4-6 psi

RIDING TIPS FOR LONG ENGINE LIFE - IMPORTANT

Every 4 hours use.

  • Do not use the gears when the bike is in motion.
  • Check all nuts & bolts & tighten where necessary as above PDI
  • Re-Adjust throttle cable & clutch cable if required
  • Re-tension chain as this will stretch in the first hours of use. This will need continual monitoring.
  • Check wheel bearings for any sign of wear of free-play
  • Check brake calliper operation & brake pad wear
  • Check spark plug gap ~0.6mm-0.7mm
  • Check tyre pressures 4-6 psi

PROBLEM SOLVING

  • No spark – Either poor earth or faulty Rotor Coils/CDI/Coil/Lead/Cap/Plug – use moving coil mustimeter to diagnose
  • Fuel leaks from overflow – Floats set incorrectly or blocked by debris or sticking
  • Engine runs fine, but then starts to misfire – faulty rotor coils/CDI/Coil/Plu
  • Engine will not tick over when warm – readjust the engine idle
  • Engine will not return to idle & races – sticking throttle cable or idle incorrectly set on the carb.

STORAGE.

  • It is advisable to fully service and lubricate the bike prior to leaving the bike unused/unattended for any length of time.
  • It is advisable to fully drain the tank and carb of fuel prior to leaving the bike unused/unattended for any length of time.

BUILT QUAD BIKES

Where quad bikes have been pre-assembled you are still required to

  1. Nut and bolt check the quad bike before use.
  2. Check chain tension is suitable for the weight of the rider.
  3. Follow the 1 hour and 4 Hour service

49cc Mini Dirt Bikes and Mini Quad Bikes

98% of problems are caused by incorrect fuel mixture and incorrect 2 stroke oil used. Mix at 25:1 ratio or debris blockage of the fuel tap.

Use a quality semi synthetic motorcycle 2 stroke oil and not gardening 2 stoke oil as gardening 2 stroke is a completely different compound of oil and clogs the spark plugs up and causes them to be difficult to start

NEVER YANK THE PULL STARTER WITH FORCE - You will snap the pull cord and these are not a warranty item. Small short pulls are all you need as the pull start is spring assisted.
Unfortunately " it was already frayed when it arrived" is an excuse we hear of everybody who snaps them. We build and start 100s of mini bikes a week and never snap pull starts.

They only snap in frustration normally because the oil mix is wrong and your relentlessly yanking at it.

This Quad Bike you have bought is one of the best available in its price bracket We put every conceivable effort into sourcing and specification in order that you will enjoy your machine to the full.

Your bike will  be supplied in a crate. This is NOT the same as buying a bike fully PDI’d (Pre-Delivery Inspection) bike from a dealer. It is entirely your responsibility to ensure a qualified motorcycle mechanic puts your bike together correctly. Failure to do so will invalidate the warranty supplied with your bike.

GUIDE FOR ASSEMBLY

This document is supplied only as a guide to a professional and may not be exhaustive. Each machine may require individual attention & therefore ONLY qualified persons should only carry out the following:

  • Remove Bike & all accessories from crate & inspect to ensure all necessary parts have been supplied correctly
  • Mount shock (where applicable)
  • Mount front wheels & ensure free rotation – check for potential bearing &/or brake drag Ensure all frame bolts are tight (use thread lock compound where necessary) – Use locking wheel nut (supplied) install locking split pins into each castle nut.
  • Pump front brake lever until firm (bleed if necessary). Check front braking system for potential leaks or damage by pulling brake lever very hard several times. Visually inspect all joints for leaks & remedy where necessary. Spin wheel to ensure calliper is releasing from disk
  • Check brake fluid levels, top up with DOT4 where necessary
  • Fit front footwells using thread locking compound where required
  • 2 Stroke mini quads and mini bikes mix fuel at 25:1 Ratio using a quality semi synthetic 2 stoke motorcycle oil. DO NOT USE GARDENING OR MOWER 2 STROKE OIL it fouls the plug and causes the bike to misfire, bog out and not start.
  • 4 Stroke 110cc and 125cc use straight unleaded fuel and replace engine oil as below 

IMPORTANT! CHAIN ADJUSTMENT

Before First Ride

  • Loosen rear axle & adjust chain tension. Find tightest point in chain by spinning rear wheel, there should 15mm up & 15mm down at the longest section of chain with rider sat on bike. Ensure chain runs true & is on top of chain roller if your models has one.
  • You can ensure chain runs true by eye then by straightening the front wheels and measuring from wheel rim front to wheel rim rear and repeating on opposite side the measurements should be same both sides. If this measurement is out your axle needs aligning and your chain will come off as its not running true.

When aligning chains its important to loosen off the top and bottom axle bolts before attempting the chain adjusters otherwise you will thread the adjusters as it tries to pull a fixed solid axle. Chain adjusters must be adjusted evenly on both sides to keep the axle square otherwise you risk throwing your chain off and damaging your engine.

Chain tension must be done with the rider on the quad bike as each rider weight will change the chain tension needed.

Nut and Bolt Check

  • Working from front to rear, ensure all nuts & bolts are tight. Where no nyloc nuts or spring washers are present, ensure thread-locking compound has been used. If none has been used during factory assembly, remove nut or bolt, apply locking compound & re-tighten. Pay particular attention to the following critical safety areas: Wheel nuts, brake calliper bolts (thread lock), Top & rear engine bolts (frame must be hard tight against the engine, use thread lock), chain tensioners, rear shock bolts, handlebar clamp bolts (yokes), Handlebars, brake/ clutch/throttle, swing-arm, front & rear sprocket, Exhaust Bracket Bolts,
  • Check all engine hardware is tight, (including but not exclusive): flywheel, inlet manifold, exhaust bolts,
  • Fully ensure nothing is touching the exhaust system including fuel lines are tied away.
  • Ensure all cables and pipes & wiring are away from moving components such as the wheels, use cable ties where necessary
  • Fuel bike & check for fuel leaks

Fill and Check oil level with quad bike in upright position using dipstick. Top up with Lucus Oil 10W 40 semi synthetic motorcycle oil, if necessary

  • Adjust tension for both clutch & throttle cables
  • Ensure wheels are tight & wheels run true
  • Start engine & warm up (using choke if necessary). Set idle speed so engine ticks over comfortably without stalling or racing

(bearing in mind that the pads will need to bed in prior to optimum performance

1 HOUR SERVICE – EXTREAMLY IMPORTANT

  • Remove Transport Oil & replace with Lucus Oil 10w 40 4-stroke engine oil
  • Re-Adjust throttle cable & clutch cable if required
  • Re-tension chain as this will stretch in the first hours of use. This will need continual monitoring.
  • Check wheel bearings for any sign of wear of free-play
  • Check Engine Idle Speed and adjust if necessary
  • Check brake calliper operation & brake pad wear
  • Check tyre pressures 4-6 psi

RIDING TIPS FOR LONG ENGINE LIFE – IMPORTANT

Every 4 hours use.

  • Do not use the gears when the bike is in motion.
  • Check all nuts & bolts & tighten where necessary as above PDI
  • Re-Adjust throttle cable & clutch cable if required
  • Re-tension chain as this will stretch in the first hours of use. This will need continual monitoring.
  • Check wheel bearings for any sign of wear of free-play
  • Check brake calliper operation & brake pad wear
  • Check spark plug gap ~0.6mm-0.7mm
  • Check tyre pressures 4-6 psi

PROBLEM SOLVING

  • No spark – Either poor earth or faulty Rotor Coils/CDI/Coil/Lead/Cap/Plug – use moving coil mustimeter to diagnose
  • Fuel leaks from overflow – Floats set incorrectly or blocked by debris or sticking
  • Engine runs fine, but then starts to misfire – faulty rotor coils/CDI/Coil/Plu
  • Engine will not tick over when warm – readjust the engine idle
  • Engine will not return to idle & races – sticking throttle cable or idle incorrectly set on the carb.

STORAGE.

  • It is advisable to fully service and lubricate the bike prior to leaving the bike unused/unattended for any length of time.
  • It is advisable to fully drain the tank and carb of fuel prior to leaving the bike unused/unattended for any length of time.

BUILT QUAD BIKES

Where quad bikes have been pre-assembled you are still required to

  1. Nut and bolt check the quad bike before use.
  2. Check chain tension is suitable for the weight of the rider.
  3. Follow the 1 hour and 4 Hour service

49cc Mini Dirt Bikes and Mini Quad Bikes

98% of problems are caused by incorrect fuel mixture and incorrect 2 stroke oil used. Mix at 25:1 ratio or debris blockage of the fuel tap.

Use a quality semi synthetic motorcycle 2 stroke oil and not gardening 2 stoke oil as gardening 2 stroke is a completely different compound of oil and clogs the spark plugs up and causes them to be difficult to start

NEVER YANK THE PULL STARTER WITH FORCE – You will snap the pull cord and these are not a warranty item. Small short pulls are all you need as the pull start is spring assisted.
Unfortunately ” it was already frayed when it arrived” is an excuse we hear of everybody who snaps them. We build and start 100s of mini bikes a week and never snap pull starts.

They only snap in frustration normally because the oil mix is wrong and your relentlessly yanking at it.

Pit Bike Build | Warranty

You have chosen wisely, the Pit Bike / Kayo Quad Bike you have bought in order that you will enjoy your machine to the full.

Your bike has been supplied in a crate. This is NOT the same as buying a bike fully PDI’d (Pre Delivery Inspection) bike from a dealer. It is entirely your responsibility to ensure a qualified motorcycle mechanic puts your bike together correctly. Failure to do so will invalidate the warranty supplied with your bike.

STOMP WARRANTY

In order to qualify for this warranty you must fill in the supplied Proof Of Purchase, PDI & Warranty & post it to the supplied address. in your user manual

GUIDE FOR STOMP BIKE ASSEMBLY

This document is supplied only as a guide to a professional and may not be exhaustive. Each machine may require individual attention & therefore ONLY qualified persons should only carry out the following:

  • Remove Bike & all accessories from crate & inspect to ensure all necessary parts have been supplied correctly
  • Mount shock (where applicable)
  • Tighten lower fork bolt, reached from underside of forks.
  • Mount front wheel & ensure free rotation – check for potential bearing &/or brake drag Ensure all frame bolts are tight (use thread lock compound where necessary) – use locking wheel nut (supplied)
  • Check spokes and tighten if necessary
  • Loosen triple clamps around fork legs & set desired fork height. Use copper grease on triple clamp bolts to prevent damage to the alloy threads & then firmly tighten
  • Fit handlebars and clutch cable to clutch lever
  • Pump front brake lever until firm (bleed if necessary). Check front braking system for potential leaks or damage by pulling brake lever very hard several times. Visually inspect all joints for leaks & remedy where necessary. Spin wheel to ensure calliper is releasing from disk
  • Fit rear brake pedal where necessary & repeat procedure described for front brake
  • Check fluid levels, top up with DOT4 where necessary
  • Fit front mudguard using thread locking compound where required
  • Fit foot pegs
  • Loosen rear wheel & adjust chain tension. Find tightest point in chain by spinning rear wheel, there should 15mm up & 15mm down at the longest section of chain with rider sat on bike. Ensure chain runs true & is on top of chain roller. Ensure chain does not foul on rear chain guide (use shims/washer to space if necessary)
  • Working from front to rear, ensure all nuts & bolts are tight. Where no nyloc nuts or spring washers are present, ensure thread-locking compound has been used. If none has been used during factory assembly, remove nut or bolt, apply locking compound & re-tighten. Pay particular attention to the following critical safety areas: Wheel nuts, brake calliper bolts (thread lock), Top & rear engine bolts (frame must be hard tight against the engine, use thread lock), chain tensioners, rear shock bolts, triple clamp bolts (yokes), Handlebars, brake/ clutch/throttle, swing-arm, front & rear sprocket
  • Check all engine hardware is tight, (including but not exclusive): flywheel, inlet manifold, exhaust bolts,
  • Remove Transit Oil and Replace with a quality Motorcycle 10w40 such as Putoline DX4 semi synthetic 10w 40 4-stroke engine oil

Adjust tappets. Set engine to TDC (ONLY rotate engine anticlockwise) & check cam timing alignment (cam sprocket/cylinder head – adjust is necessary), remove tappet covers & adjust tappet clearances : inlet ~0.15mm - exhaust ~0.20mm

  • Fully ensure nothing is touching the exhaust system. On oil cooled models, ensure the oil cooler pipes do not touch the exhaust manifold
  • that the heat protection springs are located on the correct part of the pipe in order that should they touch the exhaust the heat will not damage them.
  • Ensure all cables pipes & wiring are away from moving components such as the wheels, use cable ties where necessary Carb –SS140 – set needle height on second notch from bottom for UK conditions. 110/125/150 engines normally do not need adjustment
  • Fuel bike & check for fuel leaks

Check oil level with bike in upright position using dipstick. Top up with 10W 40 semi synthetic oil, if necessary

  • Adjust tension for both clutch & throttle cables
  • Ensure wheel spokes are tight & wheels run true
  • Start engine & warm up (using choke if necessary). Set idle speed so engine ticks over comfortably without stalling or racing

(bearing in mind that the pads will need to bed in prior to optimum performance)

1 HOUR SERVICE

  • Drain oil & replace with Putoline DX4 semi synthetic 10w 40 4-stroke engine oil
  • Check all nuts & bolts & tighten where necessary (use PDI data as reference)
  • Check flywheel nut
  • Check wheel spokes (especially rear wheel drive side) & tighten where necessary
  • Re-Adjust throttle cable & clutch cable if required
  • Re-tension chain
  • Check wheel bearings for any sign of wear of free-play
  • Check brake calliper operation & brake pad wear
  • Check spark plug gap ~0.6mm-0.7mm
  • Check tyre pressures

RIDING TIPS FOR LONG ENGINE LIFE - IMPORTANT

  • Do not over rev your engine as you may cause damage to valves. This is particularly applicable where an inner rotor kit is used. Under load the engine is capable of revving into major valve bounce that can cause permanent damage to your engine. If you feel the power dropping every 10 hours use.
  • Do not stamp through the gears – always use the clutch.
  • If you miss a gear do NOT stamp into gear from high engine revs.
  • Do not drop your clutch heavily, or slip it unnecessarily.
  • Do not allow your air filter to fill with fuel – this can occur by incorrect float height setting – see above, or the bike falling onto its side.
  • If the engine back-fires while the air filter is filled with fuel, it may ignite – check air filter regularly while riding.
STOMP PROBLEM SOLVING
  • Exhaust Glows Red (fast tick over) – Carburetion too lean, richen mixture via raising needle
  • Engine misfires at mid to high engine speed, open throttle – Mixture too rich, drop needle
  • Engine Pops & bangs on over-run – mixture too rich, drop needle
  • Engine kicks back hard whilst starting – Ignition too advanced, or mixture too lean
  • Weak Spark – Pick-up coils too far from rotor (where inner rotor kit fitted) or bad earth
  • No spark – Either poor earth or faulty Rotor Coils/CDI/Coil/Lead/Cap/Plug – use moving coil multimeter to diagnose
  • Fuel leaks from overflow – Floats set incorrectly or blocked by debris or sticking
  • Engine runs fine, but then starts to misfire – faulty rotor coils/CDI/Coil/Plug
  • Rattles from engine – Tappets set incorrectly
  • Engine will not tick over when warm – tappets set incorrectly
  • Engine will not return to idle & races – sticking throttle cable
STOMP CORRECT JETTING

Take out the spark plug and check the electrode; the colour should be golden brown. If it is white, the engine is running too lean (not enough fuel). If it is black (sooty colour) it is too rich (too much fuel). If it is white & black, the engine is VERY lean & causing misfire, which you should be able to detect whilst riding. As your jets are close to what they should be for the UK, minor alterations can be made by

To add more fuel, raise the needle one notch. This is achieved by removing the carb from the engine, removing the throttle slide, removing the needle & adjusting the position of the circlip. Conversely, if you need to reduce the amount of fuel, drop the needle one notch. Re-assemble the carb & continue testing, remembering to check the colour of your spark plug.

Once you have achieved the correct full load fuelling, you can set the idle mixture screw. The 140 & 150 engines like to run very rich at idle, this way you get a clean progression from idle jet to main jet. To achieve a richer mixture, turn the air screw (next to filter) clockwise. Idle speed may need to be adjusted at same time to keep engine running.

STORAGE.

  • It is advisable to fully service and lubricate the bike prior to leaving the bike unused/unattended for any length of time.
  • It is advisable to fully drain the tank and carb of fuel prior to leaving the bike unused/unattended for any length of time.

Q & A

How Long Do I have to return for a refund or exchange ?

Our Returns Policy lasts 14 days. If 14 days have past since the date of delivery we cannot offer a refund or exchange. To return your item to us for a refund within your 14 day period your item must be In Unused Condition and returned to us in its original packaging within the 14 day period.  Should your item arrive to us used or damaged we will deduct upto 50% of the items value based on its condition or may refuse a refund entirely.

My Product Is Damaged or Faulty

Please return your item to us within 14 days of finding the fault. You can do this by contacting us via [email protected]

  • Do Not return a product to us without first getting a return number
  • Please Do Not Use the faulty item once discovering its faulty.
  • Any Goods outside of the 30 days returns period are not eligible for a refund and will received on a repair only basis.
  • We can repair manufacturing faults however we are unable to repair goods that have been damaged in use.
  • Items must be returned in the original packaging and if received on a pallet you will need to make sure the pallet is also kept
  • No repairs will be conducted where the product is returned without the original packaging.

When Will I Get My Refund ?

Refunds can take upto 14 days from the date your return arrives back with us. When processing your refund we will consider the items condition, including the orginal packaging. refund eligibility as per the terms and conditions of sale.

If a refund is processed this can take 5 to 1o working days depending on your banks card refund policy.

I need Spare Parts  for Ride On Cars! 

Not a problem, we stock all spare parts for all the ride on cars we sell. Head on over to www.rideonspares.com select your ride on and you will be given a list of all the spare parts available for your car.

I Need Spares For Stomp, Kayo, Thumpstar, Welsh Pit Bikes

All spare parts for The above named brands can be purchased directly from stomp at www.stompparts.com


Please Note!

By accepting our terms and conditions at checkout you are agreeing to the courier leaving your parcel in a safe place should nobody be available to take delivery when he arrives. Outsideplay will take no responsibility for any theft that occurs on your premises.

Delivery is free on all orders over £50 throughout Mainland UK excluding highlands and Islands if you choose Economy Delivery at Checkout. This is a 3-4 working day service but can be much faster.

Monday to Thursday Economy Delivery Free  –  Order before 1pm and choose Free Economy Delivery for Delivery within 3-5 Days.

Monday to Thursday Express Delivery –  Order before 1pm and choose Express Delivery for Delivery the next working day Charged at £9.99 or £29.99 if its a large palletised item

Weekend Orders– Start after 1pm on Friday until Midnight on Sunday and include bank holidays
Weekend Orders Choosing Express Next Day Delivery will receive their orders on the Tuesday latest Wednesday.

Weekend Orders – Free Economy Delivery – Orders Placed over the weekend will be dispatched on the Monday excluding bank holidays and will be delivered within 3-5 days of order free of charge.

Once your product has shipped via DPD or DHL or Palletforce. You will receive an automatic email from our warehouse team with your tracking details, You can track your parcel after 5pm of the day you receive your tracking number.

Please Note – We are not currently shipping to Europe or Southern Ireland or the Islands

We are shipping certain products to Northern Ireland. Delivery charges are set by the product type, we would advise that you contact us to check if delivery of the product you wish to purchase is possible before ordering .

On every product page, you will find the delivery options available for that product. The options are as follows and will show delivery times for UK MAINLAND depending on which warehouse our stock is located in. You will be asked to make your selection in the checkout.

  • Standard (3-5 day delivery) UK Mainland
  • Northern Ireland – We are currently unable to ship parcels to Northern Ireland Due to complications caused by Brexit and import export procedures – this is a 5 day service
  • Southern Ireland – We are currently unable to ship parcels to Southern Ireland Due to complications caused by Brexit and import export procedures
  • Highlands and Islands – Highlands Mainland Only surcharge is calculated by postcode at checkout and is a 5 days service
  • Expedited (order by 2pm Monday – Thursday for same day dispatch)
  • Click and collect from our warehouse is currently unavailable due to covid restrictions
  • International – We Do Not Ship Internationally

Area’s which are excluded from the Free Delivery Promise. Large Parcels and Pallets

  • Scottish Highlands & Offshore Islands (includes Scottish Islands, Isles of Scilly, Channel Islands, Isle of Wight, Isle of Man, Inverness)
  • AB10-AB25, AB30-56 POSTCODE ££39.99 Surcharge
  • IV* POSTCODE £39.99 Surcharge
  • PO30-41* £39.99 Surcharge
  • BT* POSTCODE £99.00 Surcharge
  • GY*,JE* £126.00 Surcharge
  • ZE POSTCODE – No Shipments are possible
  • HS* POSTCODE No Shipments are possible
  • Jersey £126.00 Surcharge
  • Northern Ireland £99.00 Surcharge
  • Republic of Ireland No Deliveries Available
We are unable to ship larger parcels to Any of the Isles

For more info please see our Delivery and Returns Policy.

How Long Do I have to return for a refund or exchange ?

Our Returns Policy lasts 14 days. If 14 days have past since the date of delivery we cannot offer a refund or exchange. To return your item to us for a refund within your 14 day period your item must be In Unused Condition and returned to us in its original packaging within the 14 day period.  Should your item arrive to us used or damaged we will deduct upto 50% of the items value based on its condition or may refuse a refund entirely.

My Product Is Damaged or Faulty

Please return your item to us within 14 days of finding the fault. You can do this by contacting us via [email protected]

  • Do Not return a product to us without first getting a return number
  • Please Do Not Use the faulty item once discovering its faulty.
  • Any Goods outside of the 30 days returns period are not eligible for a refund and will received on a repair only basis.
  • We can repair manufacturing faults however we are unable to repair goods that have been damaged in use.
  • Items must be returned in the original packaging and if received on a pallet you will need to make sure the pallet is also kept
  • No repairs will be conducted where the product is returned without the original packaging.

When Will I Get My Refund ?

Refunds can take upto 14 days from the date your return arrives back with us. When processing your refund we will consider the items condition, including the orginal packaging. refund eligibility as per the terms and conditions of sale.

If a refund is processed this can take 5 to 1o working days depending on your banks card refund policy.

I need Spare Parts  for Ride On Cars! 

Not a problem, we stock all spare parts for all the ride on cars we sell. Head on over to www.rideonspares.com select your ride on and you will be given a list of all the spare parts available for your car.

Customer Reviews

Based on 2 reviews
100%
(2)
0%
(0)
0%
(0)
0%
(0)
0%
(0)
J
J.H.
You won't find a better quad for the money.

I've had this Kayo 110 for 18 months now. In that time I've only ever had to replace the rear brake pads and change the oil.

Only thing that tends to happen with ours is that the back axle loosens off after an aggressive ride so I have to keep setting the chain tension up again. No big deal tbh.

Make sure you change the oil when it's delivered as it's transit oil and check the tyre pressures. One of my wheels was over 40psi which I assume was when they were setting the bead and didn't drop it back down to 5psi before delivery.

Parts are readily available from stomp and cheap.

It starts well, idles all day when warmed up and takes hours of stick without missing a beat tbh. I think it's cheap at £1200.

A
Anonymous
Very impressed

Very very quick delivery time ! On first looks it seems high quality but not used a great deal yet ! Overall very impressed and very security packaged in a metal frame for transport ! Would highly recommend

Why choose outside play?

01.

Fast Delivery We use FedEx and DHL Parcel Service for fast, reliable deliveries.

02.

Huge UK Stocks Our distribution centre holds stock ready for fast UK delivery.

03.

Open Mon-Fri Our friendly customer support team is here to help Mon-Fri.

04.

Leading Brands We stock all the latest products from leading brands.