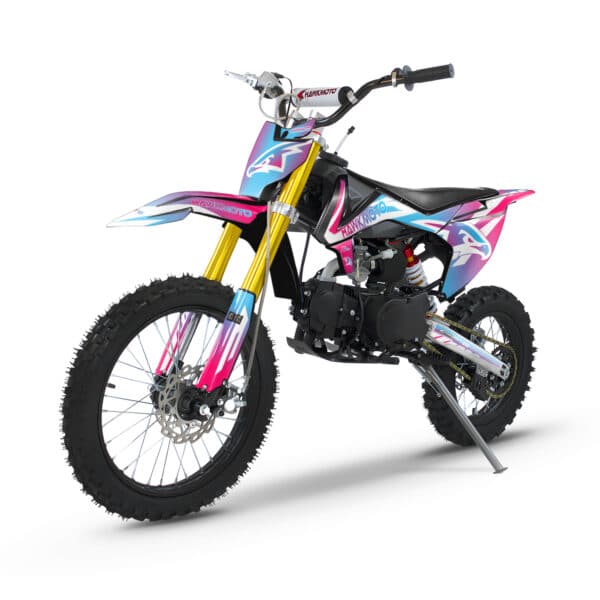
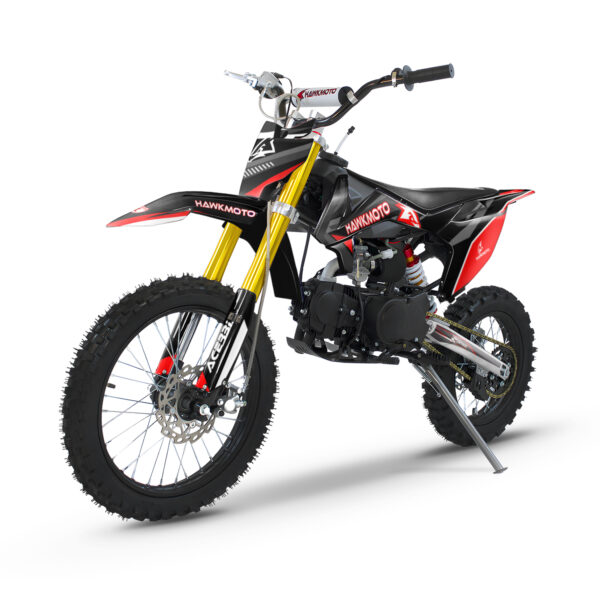
Dirt Bike Big Wheel Dirt Bike
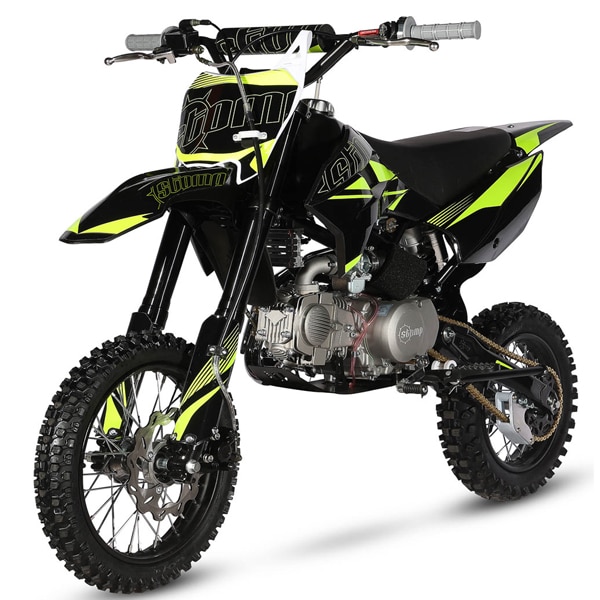
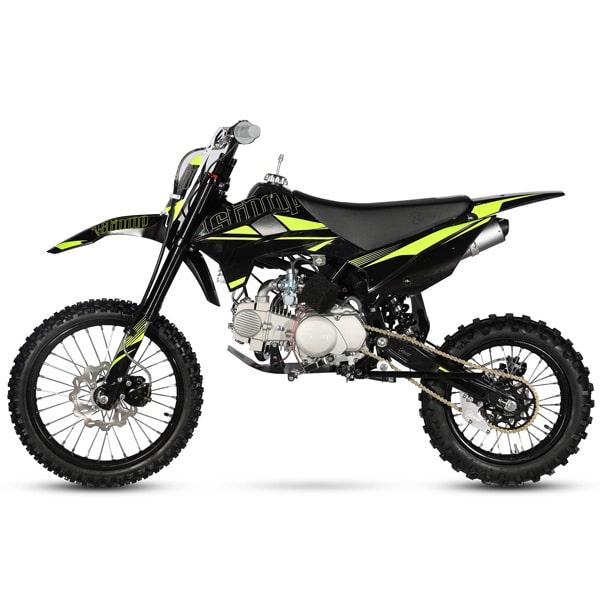
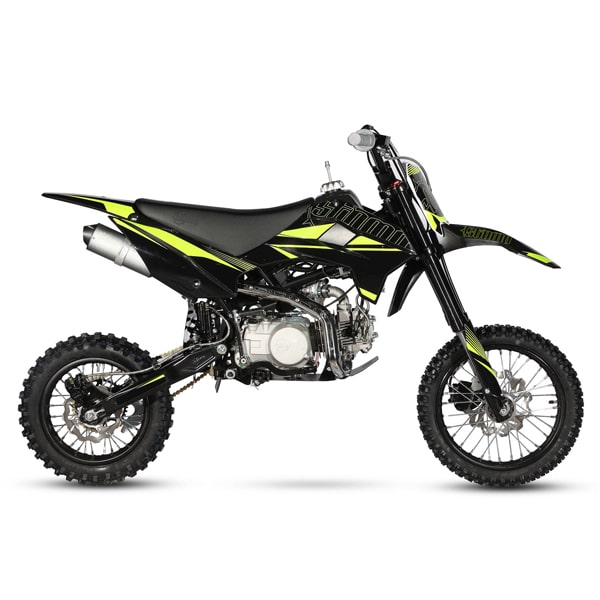
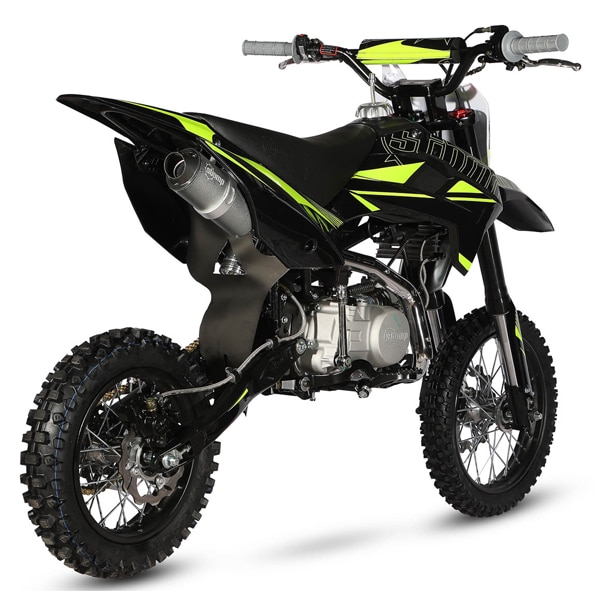
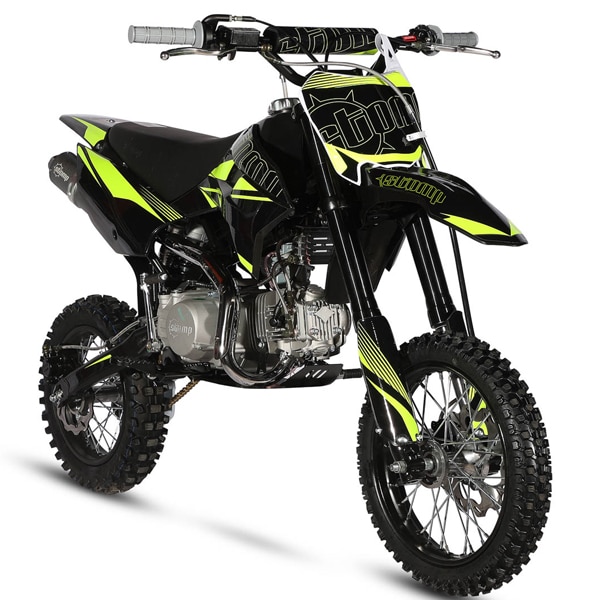
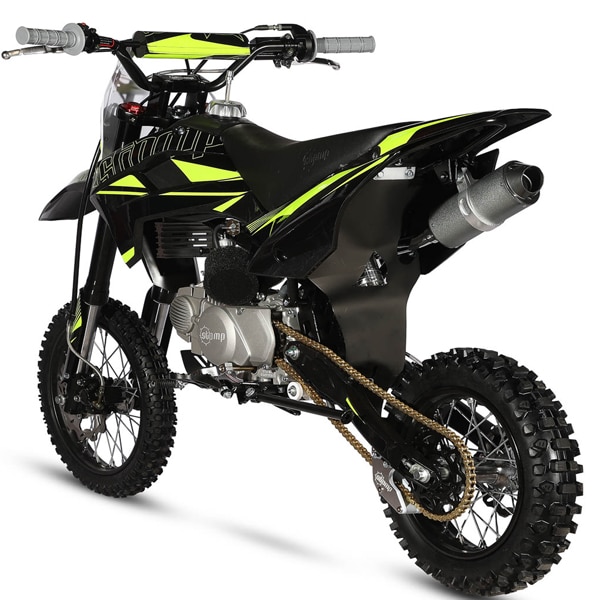
The Z3-140 Big Wheel still boasts the ‘exclusive to Stomp’ SR140C Z40 cam engine. Stomp buy in the YX140 and then fettle the engine with stiffened valve springs & a high lift race cam (known as the Z40 cam). The result is 2hp more than any other YX140 engine on the market. It might not be quite Zhongshen 155 territory but its most of the way there and significantly cheaper to install than the ZS155. If you look after the SR140C, it will prove a very reliable and cheap engine to run. With new stunning neon yellow race graphics The new-look Z3-140 also comes with updated pro foot pegs and polished hubs to complete the new look
- Stomp Racing SR140C Z40 race cam
- Start-in-gear, all-up 4-speed gearbox
- 14hp at the rear wheel
- 26mm race carb with double foam filter
- Aluminium shot blast finished cases with Stomp logo
- CNC oil cooler with braided steel hoses
- SDG2 heavy duty cradle frame for ultimate stiffness and control
- Removable rear subframe & bolt on engine hangers
- Revised light-weight tig welded 430mm swing arm
- Extended 735mm CNC machined USD oil filled forks
- Drop forged black anodised triple clamps (yokes)
- Nitrogen filled 290mm piggyback shock with steel bushes
- 17/14 SDG wheels with steel rims for strength
- Superb durable and tough Innova pattern MX tyres
- Improved and revised light-weight brake master cylinders and calipers
- Vented light-weight rotors
- Alloy oval exhaust muffler
- Mandrill bent big bore 32mm OD race pipe
- Features full length alloy heat shield for style and protection
- Pro-taper style minibike bars
- Renthal style soft rubber grips
- Forged alloy clutch & brake levers
- 420 KMC chain with engraved alloy/nylon chain guide
- 420 41t lightweight durable rear sprocket
- 420 16t front sprocket
- Fold back gear selector
- NEW upgraded PRO footpegs
- NEW reinforced poly resin 5.5 ltr fuel tank with alloy cnc filler cap
- NEW revised firmer seat with Stomp logo
- NEW Detroit hi impact polypropylene plastics
- Wrap around crf number board with front brake pipe tidy
- New Stomp neon yellow race graphics kit with Stomp race sponsor’s logos
- Seat height 84cm
- Dry weight 71kg
- Weight limit 15 stoneColours and specification are subject to change without notice. All pit bikes come with a 30 day parts only warranty.
View all Dirt Bikes
[id= 6130]
Additional information
Pit Bike Build | Warranty
You have chosen wisely,
Your bike has been supplied in a crate. This is NOT the same as buying a bike fully PDI’d (Pre Delivery Inspection) bike from a dealer. It is entirely your responsibility to ensure a qualified motorcycle mechanic puts your bike together correctly. Failure to do so will invalidate the warranty supplied with your bike.
WARRANTY
In order to qualify for this warranty you must provide proof of build by a qualified motorcycle shop.
GUIDE FOR HAWKMOTO BIKE ASSEMBLY
This document is supplied only as a guide to a professional and may not be exhaustive. Each machine may require individual attention & therefore ONLY qualified persons should only carry out the following:
Notes for Qualified Motocycle Builder. - Please produce a signed off PDI Sheet with invoice for the bike build.
- Remove Bike & all accessories from crate & inspect to ensure all necessary parts have been supplied correctly and their is no damage - Any damage must be reported within 24 hours of receipt of the bike and prior to building the bike. - We cannot take responsibility for damage after you have built and stickered the bike up.
- Mount shock (where applicable)
- Tighten lower fork bolt, reached from underside of forks.
- Mount front wheel & ensure free rotation – check for potential bearing &/or brake drag Ensure all frame bolts are tight (use thread lock compound where necessary) – use locking wheel nut (supplied)
- Check spokes and tighten if necessary
- Loosen triple clamps around fork legs & set desired fork height. Use copper grease on triple clamp bolts to prevent damage to the alloy threads & then firmly tighten
- Fit handlebars and clutch cable to clutch lever
- Pump front brake lever until firm (bleed if necessary). Check front braking system for potential leaks or damage by pulling brake lever very hard several times. Visually inspect all joints for leaks & remedy where necessary. Spin wheel to ensure calliper is releasing from disk
- Fit rear brake pedal where necessary & repeat procedure described for front brake
- Check fluid levels, top up with DOT4 where necessary
- Fit front mudguard using thread locking compound where required
- Fit foot pegs
- Loosen rear wheel & adjust chain tension. Find tightest point in chain by spinning rear wheel, there should 15mm up & 15mm down at the longest section of chain with rider sat on bike. Ensure chain runs true & is on top of chain roller. Ensure chain does not foul on rear chain guide (use shims/washer to space if necessary)
- Working from front to rear, ensure all nuts & bolts are tight. Where no nyloc nuts or spring washers are present, ensure thread-locking compound has been used. If none has been used during factory assembly, remove nut or bolt, apply locking compound & re-tighten. Pay particular attention to the following critical safety areas: Wheel nuts, brake calliper bolts (thread lock), Top & rear engine bolts (frame must be hard tight against the engine, use thread lock), chain tensioners, rear shock bolts, triple clamp bolts (yokes), Handlebars, brake/ clutch/throttle, swing-arm, front & rear sprocket
- Check all engine hardware is tight, (including but not exclusive): flywheel, inlet manifold, exhaust bolts,
- Remove Transit Oil and Replace with a quality Motorcycle 10w40 such as Putoline DX4 semi synthetic 10w 40 4-stroke engine oil
Adjust tappets. Set engine to TDC (ONLY rotate engine anticlockwise) & check cam timing alignment (cam sprocket/cylinder head – adjust is necessary), remove tappet covers & adjust tappet clearances : inlet ~0.15mm - exhaust ~0.20mm
- Fully ensure nothing is touching the exhaust system. On oil cooled models, ensure the oil cooler pipes do not touch the exhaust manifold
- that the heat protection springs are located on the correct part of the pipe in order that should they touch the exhaust the heat will not damage them.
- Ensure all cables pipes & wiring are away from moving components such as the wheels, use cable ties where necessary Carb –SS140 – set needle height on second notch from bottom for UK conditions. 110/125/150 engines normally do not need adjustment
- Fully charge battery before use
- Fuel bike & check for fuel leaks
Check oil level with bike in upright position using dipstick. Top up with 10W 40 semi synthetic oil, if necessary
- Adjust tension for both clutch & throttle cables
- Ensure wheel spokes are tight & wheels run true
- Start engine & warm up (using choke if necessary). Set idle speed so engine ticks over comfortably without stalling or racing
(bearing in mind that the pads will need to bed in prior to optimum performance)
1 HOUR SERVICE
- Drain oil & replace with semi synthetic 10w 40 4-stroke Motocycle engine oil it must be motocycle grade and not car grade
- Check all nuts & bolts & tighten where necessary (use PDI data as reference)
- Check flywheel nut
- Check wheel spokes (especially rear wheel drive side) & tighten where necessary
- Re-Adjust throttle cable & clutch cable if required
- Re-tension chain
- Check wheel bearings for any sign of wear of free-play
- Check brake caliper operation & brake pad wear
- Check spark plug gap ~0.6mm-0.7mm
- Check tyre pressures
RIDING TIPS FOR LONG ENGINE LIFE - IMPORTANT
- Do not over rev your engine as you may cause damage to valves.. Under load the engine is capable of revving into major valve bounce that can cause permanent damage to your engine.
- If you miss a gear do NOT stamp into gear from high engine revs.
- Do not allow your air filter to fill with fuel – this can occur by incorrect float height setting – see above, or the bike falling onto its side.
- If the engine back-fires while the air filter is filled with fuel, it may ignite – check air filter regularly while riding.
PROBLEM SOLVING
- Exhaust Glows Red (fast tick over) – Carburetion too lean, richen mixture via raising needle
- Engine misfires at mid to high engine speed, open throttle – Mixture too rich, drop needle
- Engine Pops & bangs on over-run – mixture too rich, drop needle
- Engine kicks back hard whilst starting – Ignition too advanced, or mixture too lean
- Weak Spark – Pick-up coils too far from rotor (where inner rotor kit fitted) or bad earth
- No spark – Either poor earth or faulty Rotor Coils/CDI/Coil/Lead/Cap/Plug – use moving coil multi meter to diagnose
- Fuel leaks from overflow – Floats set incorrectly or blocked by debris or sticking
- Engine runs fine, but then starts to misfire – faulty rotor coils/CDI/Coil/Plug
- Rattles from engine – Tappets set incorrectly
- Engine will not tick over when warm – tappets set incorrectly
- Engine will not return to idle & races – sticking throttle cable
Take out the spark plug and check the electrode; the colour should be golden brown. If it is white, the engine is running too lean (not enough fuel). If it is black (sooty colour) it is too rich (too much fuel). If it is white & black, the engine is VERY lean & causing misfire, which you should be able to detect whilst riding. As your jets are close to what they should be for the UK, minor alterations can be made by
To add more fuel, raise the needle one notch. This is achieved by removing the carb from the engine, removing the throttle slide, removing the needle & adjusting the position of the circlip. Conversely, if you need to reduce the amount of fuel, drop the needle one notch. Re-assemble the carb & continue testing, remembering to check the colour of your spark plug.
Once you have achieved the correct full load fueling, you can set the idle mixture screw. The 140 & 150 engines like to run very rich at idle, this way you get a clean progression from idle jet to main jet. To achieve a richer mixture, turn the air screw (next to filter) clockwise. Idle speed may need to be adjusted at same time to keep engine running.
STORAGE.
- It is advisable to fully service and lubricate the bike prior to leaving the bike unused/unattended for any length of time.
- It is advisable to fully drain the tank and carb of fuel prior to leaving the bike unused/unattended for any length of time.
Please Note!
By accepting our terms and conditions at checkout you are agreeing to the courier leaving your parcel in a safe place should nobody be available to take delivery when he arrives. Outsideplay will take no responsibility for any theft that occurs on your premises.
Delivery is free on all orders over £50 throughout Mainland UK excluding highlands and Islands if you choose Economy Delivery at Checkout. This is a 3-4 working day service but can be much faster.
Monday to Thursday Economy Delivery Free – Order before 1pm and choose Free Economy Delivery for Delivery within 3-5 Days.
Monday to Thursday Express Delivery – Order before 1pm and choose Express Delivery for Delivery the next working day Charged at £9.99 or £29.99 if its a large palletised item
Weekend Orders– Start after 1pm on Friday until Midnight on Sunday and include bank holidays
Weekend Orders Choosing Express Next Day Delivery will receive their orders on the Tuesday latest Wednesday.
Weekend Orders – Free Economy Delivery – Orders Placed over the weekend will be dispatched on the Monday excluding bank holidays and will be delivered within 3-5 days of order free of charge.
Once your product has shipped via DPD or DHL or Palletforce. You will receive an automatic email from our warehouse team with your tracking details, You can track your parcel after 5pm of the day you receive your tracking number.
Please Note – We are not currently shipping to Europe or Southern Ireland or the Islands
We are shipping certain products to Northern Ireland. Delivery charges are set by the product type, we would advise that you contact us to check if delivery of the product you wish to purchase is possible before ordering .
On every product page, you will find the delivery options available for that product. The options are as follows and will show delivery times for UK MAINLAND depending on which warehouse our stock is located in. You will be asked to make your selection in the checkout.
- Standard (3-5 day delivery) UK Mainland
- Northern Ireland – We are currently unable to ship parcels to Northern Ireland Due to complications caused by Brexit and import export procedures – this is a 5 day service
- Southern Ireland – We are currently unable to ship parcels to Southern Ireland Due to complications caused by Brexit and import export procedures
- Highlands and Islands – Highlands Mainland Only surcharge is calculated by postcode at checkout and is a 5 days service
- Expedited (order by 2pm Monday – Thursday for same day dispatch)
- Click and collect from our warehouse is currently unavailable due to covid restrictions
- International – We Do Not Ship Internationally
Area’s which are excluded from the Free Delivery Promise. Large Parcels and Pallets
- Scottish Highlands & Offshore Islands (includes Scottish Islands, Isles of Scilly, Channel Islands, Isle of Wight, Isle of Man, Inverness)
- AB10-AB25, AB30-56 POSTCODE ££39.99 Surcharge
- IV* POSTCODE £39.99 Surcharge
- PO30-41* £39.99 Surcharge
- BT* POSTCODE £99.00 Surcharge
- GY*,JE* £126.00 Surcharge
- ZE POSTCODE – No Shipments are possible
- HS* POSTCODE No Shipments are possible
- Jersey £126.00 Surcharge
- Northern Ireland £99.00 Surcharge
- Republic of Ireland No Deliveries Available
We are unable to ship larger parcels to Any of the Isles
For more info please see our Delivery and Returns Policy.
How Long Do I have to return for a refund or exchange ?
Our Returns Policy lasts 14 days. If 14 days have past since the date of delivery we cannot offer a refund or exchange. To return your item to us for a refund within your 14 day period your item must be In Unused Condition and returned to us in its original packaging within the 14 day period. Should your item arrive to us used or damaged we will deduct upto 50% of the items value based on its condition or may refuse a refund entirely.
My Product Is Damaged or Faulty
Please return your item to us within 14 days of finding the fault. You can do this by contacting us via [email protected]
- Do Not return a product to us without first getting a return number
- Please Do Not Use the faulty item once discovering its faulty.
- Any Goods outside of the 30 days returns period are not eligible for a refund and will received on a repair only basis.
- We can repair manufacturing faults however we are unable to repair goods that have been damaged in use.
- Items must be returned in the original packaging and if received on a pallet you will need to make sure the pallet is also kept
- No repairs will be conducted where the product is returned without the original packaging.
When Will I Get My Refund ?
Refunds can take upto 14 days from the date your return arrives back with us. When processing your refund we will consider the items condition, including the orginal packaging. refund eligibility as per the terms and conditions of sale.
If a refund is processed this can take 5 to 1o working days depending on your banks card refund policy.
I need Spare Parts for Ride On Cars!
Not a problem, we stock all spare parts for all the ride on cars we sell. Head on over to www.rideonspares.com select your ride on and you will be given a list of all the spare parts available for your car.


